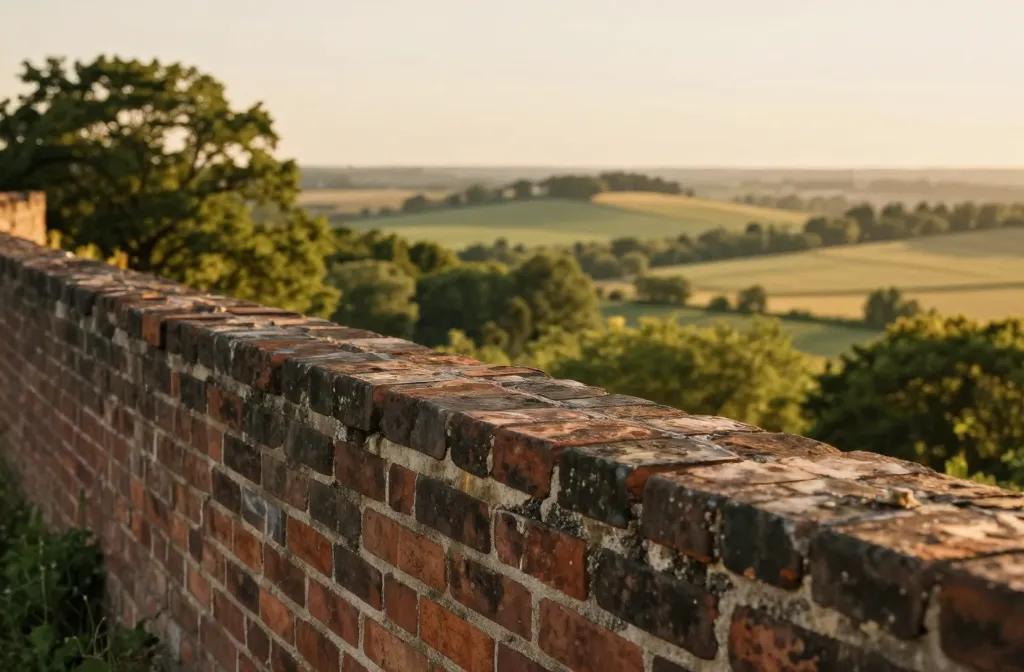
The look of a brick wall can tell you a lot. It’s stubborn, sturdy, and kind of smug about it. Repointing is the repair hack that keeps that attitude from turning triste. If your brickwork cries out for some love, you’re in the right place. Let’s demystify repointing so you can DIY with confidence or chat smart with a pro.
What repointing actually is—and why it matters
Repointing isn’t about replacing whole bricks. It’s about renewing the mortar that binds them together. Over time, mortar can crack, crumble, or wash away, leaving gaps that invite water and cold into your walls. Think of mortar as the grout in a mosaic; when it erodes, the whole thing looks tired and fragile.
– It stops water ingress: damp is sneaky and loves to creep through tiny gaps.
– It improves insulation: solid joints help keep heat in and drafts out.
– It preserves structural integrity: loose bricks can rattle and shift, especially in windy climates.
– It freshens the look: tidy joints make brickwork look sharp again.
Think of repointing as giving your wall a tiny spa day, not a full-on renovation. It’s a targeted fix that pays off for years.
What you’ll need before you start
Preparation saves you from late-night swearing at your trowel. Here’s a quick shopping and prep list so you’re not messing around on day one.
- Mortar mix: match the original as closely as possible. Many old bricks want lime-based mortar; modern bricks often tolerate cement-lime mixes. If you’re unsure, ask a pro or test a small area.
- Tools: grout bag or pointing trowel, pointing tool, soft brush, chisel, hammer, mortar rake, a spray bottle for dampening.
- Water and a sponge: cleaning up is half the battle.
- Safety gear: goggles, gloves, and a dust mask. This isn’t popcorn heaven—you’re dealing with dust and sharp bits.
- Borrowed time: plan for a few days of decent weather. You don’t want a sudden rain shower ruining your freshly repointed joints.
If you’re unsure about moisture or salt issues, FYI—these can complicate repointing. It’s worth sniffing out any damp spots or salt efflorescence before you dive in.
Types of mortar you’ll run into
Mortar isn’t one-size-fits-all. The brick, the climate, and the age of the wall all determine the recipe. Here are the big flavors you’ll encounter.
The lime-based classic
Lime mortar is forgiving and breathable. It flexes with the wall rather than fighting it, which is why older buildings often love it. If you’ve got soft, handmade bricks or a historic wall, lime-based mortar is usually the right call.
– Pros: great for breathability, reduced risk of cracking, historical accuracy.
– Cons: slower setting, sometimes needs longer cure times, not as strong in heavy-duty situations.
The cement-lime modern twist
For new builds or bricks that can handle a bit more rigidity, a cement-lime mix works well. It’s stronger than pure lime but still retains some flexibility.
– Pros: quicker to set, stronger, good for external walls in modern homes.
– Cons: if your wall is historic, it can trap moisture if you’re not careful.
Pure cement (in a pinch)
You’ll see cement-based mortars in some older industrial buildings, or when a quick fix is needed. It’s not ideal for historic brick and can trap moisture, so use cautiously.
– Pros: strong, fast-setting.
– Cons: not breathable, can cause brick and mortar damage if the wall moves.
If you’re unsure which mix to pick, a quick chat with a local bricklayer or a DIY-savvy pro can save you headaches later.
Step-by-step: the repointing process made simple
Here’s the gist of a straightforward repointing job. The exact steps can vary depending on your wall type and local conditions, but this outline covers the essentials.
- Inspect and plan: walk the wall, note cracked joints, loose bricks, or areas that need more attention. Decide on the area size for today’s session to avoid overwhelm.
- Remove old mortar: use a chisel or a mortar rake to clean out the old, crumbling stuff. You want clean joints with a solid edge to grab onto.
- Clean and dampen: brush away dust and dampen the joints slightly. Damp joints help the new mortar adhere without sucking moisture away too fast.
- Mix mortar: follow the manufacturer’s ratios. Aim for a consistency that sticks to the pointing trowel but isn’t gloopy. If you can’t pretend you’re frosting a cake, you’ve got the right consistency.
- Pack and smooth: using a pointing trowel or a grouting bag, press mortar firmly into the joint. Leave a slight concave or flush profile, depending on your aesthetic and the original joints.
- Tool and finish: run a jointing tool along the joints to create a neat finish. Wipe excess mortar with a damp sponge for clean lines.
- Clean up and cure: keep the wall moist for a few days to cure slowly, reducing cracks. Don’t blast it with sun or wind—let it settle.
A few practical tips:
– Work in shade if possible. Sun and wind can dry mortar too quickly, causing cracks.
– Don’t overfill joints. You want to restore the joint, not create new brick-sized cavities.
– Check for movement. If the wall shifts a lot, you may need additional reinforcement beyond repointing.
Common pitfalls and how to dodge them
Even with the best intentions, repointing can go sideways. Here are the traps and how to avoid them.
Choosing the wrong mortar
If you pick a mortar that’s too strong, your bricks might crack instead of flexing with temperature and foundation shifts. Always aim for compatibility with the brick and the wall’s age.
Rushing the cure
Drying too fast leads to cracks and weak joints. Slow, steady curing beats speed any day. Keep the wall damp for a few days if the forecast is dry.
Neglecting drainage and damp issues
Repointing won’t fix a leaky gutter or a damp wall. Solve moisture problems first, or you’ll be repointing again soon.
Ignoring the aesthetic of the joints
Different homes have different joint profiles—V, flat, or concave. Match the original to preserve charm. If you’re unsure, a quick test patch helps you nail the look.
When to call in a pro—and what to expect
DIY repointing is doable, but some walls deserve a pro’s touch. If you notice wide cracks, bulging bricks, damp patches that won’t quit, or if you’re dealing with historic features with lime mortar, it’s probably time to bring in an expert.
– What you’ll pay depends on wall size, mortar type, and accessibility. Expect a range based on region and labor rates.
– Pros can identify underlying issues like movement, brick spalling, or salt efflorescence and fix those, not just the surface.
– A good pro will discuss mortar mixes, wind protection for curing, and safety considerations—plus they’ll get the right joints to match.
If you decide to hire, ask these questions:
– What mortar mix do you recommend for my bricks?
– How will you ensure breathability and moisture control?
– Can you show me a sample patch before proceeding?
– What’s the anticipated cure time, and how should I protect the wall during it?
Preserving brickwork for the long haul
Repointing isn’t a one-and-done deal; it’s part of ongoing brickwork maintenance. A few habits keep things looking good for years.
– Inspect annually: look for cracks, missing mortar, or damp spots after heavy rain.
– Keep drainage clear: gutters and downpipes should direct water away from the wall.
– Clean gently: use a brush or low-pressure wash if needed, but skip harsh jets that can erode joints.
– Monitor movement: some walls settle over time. If you see widening cracks, address them before they become a bigger headache.
If you’re into the nerdy details, regularly checking for salt efflorescence (the white powdery stuff) is a good idea. It’s a signal that moisture movement isn’t being handled well; tackle that moisture first, then repoint as needed.
DIY vs. pro cheat sheet
– DIY pros: cost savings, immediate control, great sense of accomplishment.
– DIY cons: time investment, potential for mistakes in historic or complex walls.
– Pro pros: code-compliant work, long-term durability, knowledge of local brick types and mixtures.
– Pro cons: upfront cost, scheduling lead times.
If you want the best of both worlds, you can do the smaller, simpler sections yourself and leave the tricky historic or structurally sensitive spots to a pro. IMO it’s a smart compromise.
Frequently Asked Questions
Can I repoint a brick wall that’s holding water?
Water-worn bricks and damp walls need a careful approach. First fix the moisture source—leaks, poor drainage, or rising damp. Then repoint with a breathable mortar that helps moisture escape rather than trap it. If the wall still drips after tender care, bring in a pro.
How long does repointing typically take?
It depends on wall size, complexity, and weather. A small, accessible section might take a weekend. A large or intricate wall could stretch into several days or more. Plan for drying times and weather windows.
Is lime mortar better than cement for old brick houses?
Usually yes for traditional or historic brickwork. Lime mortar matches the wall’s natural breathability and flexibility, reducing cracking. Cement-lime blends can be used where stronger bonding is needed, but compatibility is key.
Will repointing fix damp issues permanently?
Not by itself. If damp is present, you must address the moisture source—think gutters, downpipes, damp-proofing, or ventilation. Repointing helps the wall resist water ingress, but it won’t stop the water if the cause remains untreated.
How can I tell if my joints need repointing?
Look for crumbly, crumbling, or missing mortar, gaps that catch a fingernail, and visible cracks that widen with seasonal changes. If bricks sit loose or you see damp patches after rain, it’s likely time to repoint.
Conclusion
Repointing brickwork is a practical punch-up for tired walls. It preserves history, boosts energy efficiency, and makes your exterior look sharp again. Do a little digging, pick the right mortar, and take your time. FYI, patience pays here—let it cure properly, and you’ll thank yourself every time you walk past that brick wall without cringing at the gaps.
If you’re feeling curious or unsure, drop a question below. If you’ve tried repointing before, I want to hear how it went—the good, the bad, and the surprisingly satisfying mud-smear moments. Remember: a well-tended wall isn’t just sturdy; it’s character you can feel.