You can cut your heating bill without turning your life into a cardboard fortress. Let’s dive into practical, cheap ways to boost home insulation without sinking a fortune or turning your house into a bubble wrap museum.
Small tweaks, big impact: where to start
If your home could talk, it would whisper “insulation, please.” The good news: most gains come from simple, affordable fixes you can do in a weekend. You’ll notice warmer rooms, less drafts, and your wallet will thank you. FYI, this isn’t about sealing every air leak with super glue and duct tape (though some tape helps). It’s about smart, targeted improvements that actually last.
Seal the leaks before you stuff the walls

Drafts are stealthy. They creep in around doors, windows, electrical outlets, and attic hatches. The less air rushing through, the warmer your space stays.
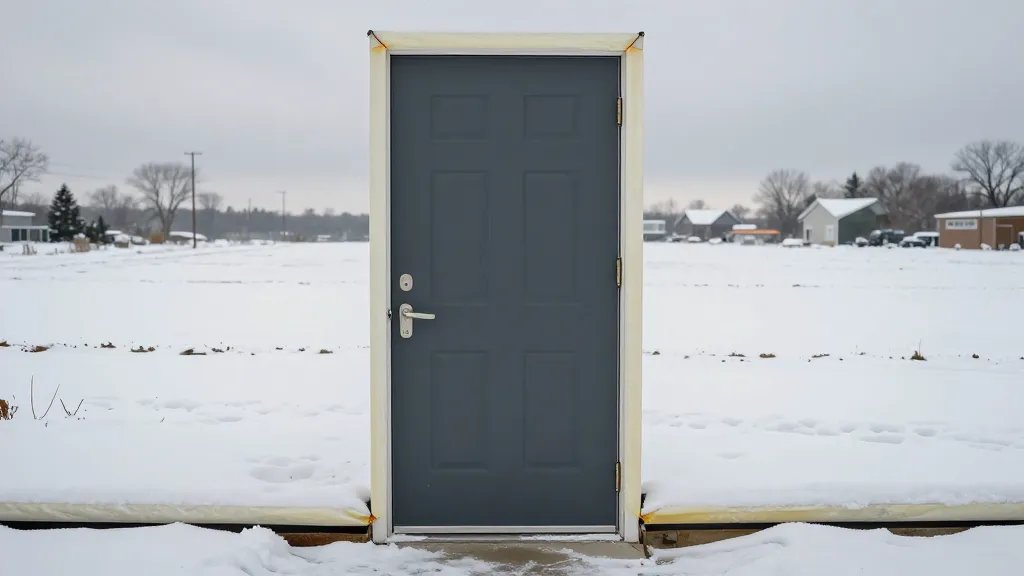
- Door sweeps and weatherstripping: Install or replace door sweeps. Add weatherstripping to exterior doors and windows that don’t seal well. It’s cheap and quick.
- Outlet and switch gaskets: Place foam gaskets behind wall plates. Tiny gaps add up across the year.
- Chimney and attic hatches: A tight-lid hatch or a weatherproof cover stops dramatic drafts from sneaking in above.
- Ceiling and attic access: If you can see daylight from the attic, you’re paying for it every winter. Seal it with caulk or foam and add a proper hatch seal.
Deeper dive: door and window strategies
If you’re staring at old windows, you might feel tempted to replace all of them. Don’t rush. Start with plastic window film for seasonal use—great for single-pane windows. For doors, a door sweep paired with weatherstripping usually cuts drafts by a huge margin. If you have storm windows, keep them to slice heat loss further. FYI, the goal is to limit convection near the opening, not to turn your living room into a sauna.
Insulate, but not with your paycheck: budget-friendly materials
Insulation thickness matters, but so does the right type for the right spot. You don’t need to fill every cavity with expensive stuff; you just need to target the critical areas.
- DIY first: mineral wool or fiberglass rolls for attics and crawl spaces. Both are affordable and effective when installed properly.
- Radiant barriers or reflective foil in hot climates can reduce heat gain, saving AC costs. Not always necessary in cooler zones, but worth a glance if you’re building or re-roofing.
- Rigid foam boards for basement walls or under exterior sheathing. They’re lightweight, easy to cut, and do a solid job without a huge price tag.
- Blown-in insulation for attic spaces if you have access through a hatch. It’s efficient and can be cheaper than heavy labor DIY in some cases.
Choosing the right guest stars for your walls
If you can’t decide between fiberglass and mineral wool, here’s a quick cheat sheet: fiberglass is cheap and easy to work with, but mineral wool is denser and handles moisture a bit better. For a typical home, a mix of attic insulation with upgraded basement or crawl space insulation gives the best bang for buck. You don’t need to go full R-60 unless you have extreme winters or high utility costs.
Insulate the attic: the most magic space in your house
Attics are basically heat-sucking leeches if you neglect them. The right attic insulation makes the whole house feel cozier and cuts heating costs dramatically.
- Check current depth: If you can see the joists, you probably need more. Aim for the recommended R-value for your region, but even adding a few inches helps a lot.
- Vapor barrier rules: Put a vapor barrier where moisture is a risk. It prevents mold and keeps insulation effective.
- Seal first, insulate second: Don’t just dump insulation on a leaky attic. Seal gaps (around vents, plumbing, and electrical wiring) first to lock in your gains.
- Pest-proofing: Inspect for mice or raccoons who’ve turned your attic into a luxury condo. One quick pass with steel mesh can save later headaches.
Hiding insulation without ruining the vibe
If you’re doing an attic project, consider accessible, blown-in insulation or modular batts that you can install in layers. It keeps you flexible for future upgrades and avoids a messy job that makes your careful decorating look sad.
Basement and crawl spaces: not glamorous, but essential
Cold floors and damp basements aren’t just vibes—they’re energy drains. A little effort here yields big comfort and long-term durability.
- Seal cracks and vents: Look for cracks in the foundation and seal them with caulk or spray foam. Close crawlspace vents if you live in a cold climate—unless you need them for moisture control.
- Encapsulate where needed: In damp basements, consider a moisture barrier and proper insulation on walls. It reduces humidity and keeps your heating from fighting a losing battle.
- Floor insulation options: Rigid foam boards under a finished floor or a simple layer of insulation beneath the subfloor can reduce cold transfer.
Moisture check: mold, mildew, and your budget
Humidity wrecks insulation by degrading materials. Install a small, budget-friendly dehumidifier if needed and make sure ceilings aren’t leaking water. Dry air is not cooler air, but it feels more comfortable, so don’t ignore moisture.
Windows on a budget: tricks that feel like upgrades

Windows often feel like a big-ticket item, but you can improve their efficiency with pocket-friendly moves.
- Thermal curtains or blinds: Heavy drapes at night help hold heat in. In summer, lighter curtains reflect heat. It’s a seasonal ninja trick.
- Window insulation film: Clear film reduces drafts and improves comfort without replacing panes. It’s DIY and cheap.
- Storm windows or panels: If you’re in a climate with cold winters, storm windows add extra insulation without the full window replacement price.
Smart layout, not pricey hardware
Arrange furniture to avoid blocking radiators or heat vents. It sounds simple, but a sofa pressed against a radiator blocks warmth. Move it a few inches away and let the heat circulate. Your toes will thank you.
Doors, walls, and floors: making the space feel snug
This isn’t about fancy renovations; it’s about practical placement and the right materials.
- Wall insulation upgrades: If you’re remodeling, consider insulating interior walls that face uninsulated spaces like a garage or basement. It’s cheaper than wrapping the whole house and can cut drafts dramatically in the rooms you use most.
- Floor comfort: Add thick rugs in living areas over cold subfloors. Rugs feel amazing on chilly mornings and cut heat loss through the floor a surprising amount.
- Seal electrical penetrations: Electrical boxes on exterior walls can leak air. Put foil-backed tape or gaskets around boxes to curb drafts.
Small project, big returns
A few hours of labor can turn a chilly room into a snug sanctuary. This is where the “cheap” in cheap insulation really shines: you pay with sweat, not savings, and your comfort improves immediately.
Energy-saving habits that boost your insulation gains
Insulation helps, but behavior matters too. A few tweaks can amplify every dollar you spend on insulation.
- Programmable thermostat: A smart thermostat or a simple programmable one can keep homes warmer when you’re there and cooler when you’re away. It’s like having a tiny energy coach living in your wall.
- Ventilation check: Don’t over-ventilate. Balanced air exchange prevents moisture buildup while keeping the heat in where it belongs.
- Zone heating: Heat only the rooms you use. If you live in a small home or a condo, this is a no-brainer. Close vents in unused rooms, but don’t overdo it—uneven pressure can cause other issues.
FYI on DIY ceiling hacks
A couple of quick ceiling tweaks can stop heat from ghosting into the attic. Consider a DIY caulk-and-seal approach around any recessed lighting fixtures or ceiling penetrations. It’s a small job that stops big heat losses.
FAQ
How do I know if my house needs more insulation?
If your rooms feel drafty, you have noticeable temperature swings, or your energy bills are higher than your neighbors’ with similar homes, you likely do. A simple DIY R-value check isn’t perfect, but it gives you a rough idea of where to start.
What’s the cheapest insulation option that actually works?
Seal leaks first, then add insulation to the attic and basement crawl spaces. Weatherstripping, door sweeps, and outlet gaskets are incredibly cheap with surprisingly big results. For actual insulation, fiberglass or mineral wool batts are affordable and effective for DIY installation.
Can I insulate without tearing into walls?
Yes. Focus on attic, basement, and crawl space insulation, plus weatherstripping doors and windows. If you must address a wall, consider blown-in insulation or insulation boards from the interior side in select spots rather than a full wall redo.
Is professional help necessary for attic insulation?
Not always. If you’re comfortable with basic DIY and have safe access to your attic, you can install most types of insulation yourself. If you encounter mold, moisture problems, or electrical work that scares you, call a pro. It’s worth it for safety and efficiency.
How long does cheap insulation take to pay for itself?
Typically, you’ll see a noticeable drop in heating bills within a season or two, depending on climate and how aggressively you tackle drafts. If you live in a very cold area and crank the heat, the savings stack up even faster.
Conclusion
Improving home insulation on a budget isn’t about turning your place into a bunker. It’s about smart, targeted steps that keep warm air in and cold air out. Start with the basics—seal the leaks, upgrade attic and basement insulation, and tidy up doors and windows. Then add in some budget-friendly comfort tweaks like thick curtains and rugs. You’ll feel the difference in weeks, not months, and your bank account will notice too.
If you want, I can tailor a simple, step-by-step plan for your house based on your climate, current insulation, and any DIY comfort level. We’ll map out the cheapest wins first and save the big-ticket stuff for a rainy day (or a well-planned upgrade). Either way, you’re on your way to a warmer home that doesn’t beg for forgiveness every winter night. IMO, it’s your smart little mission with a big payoff.