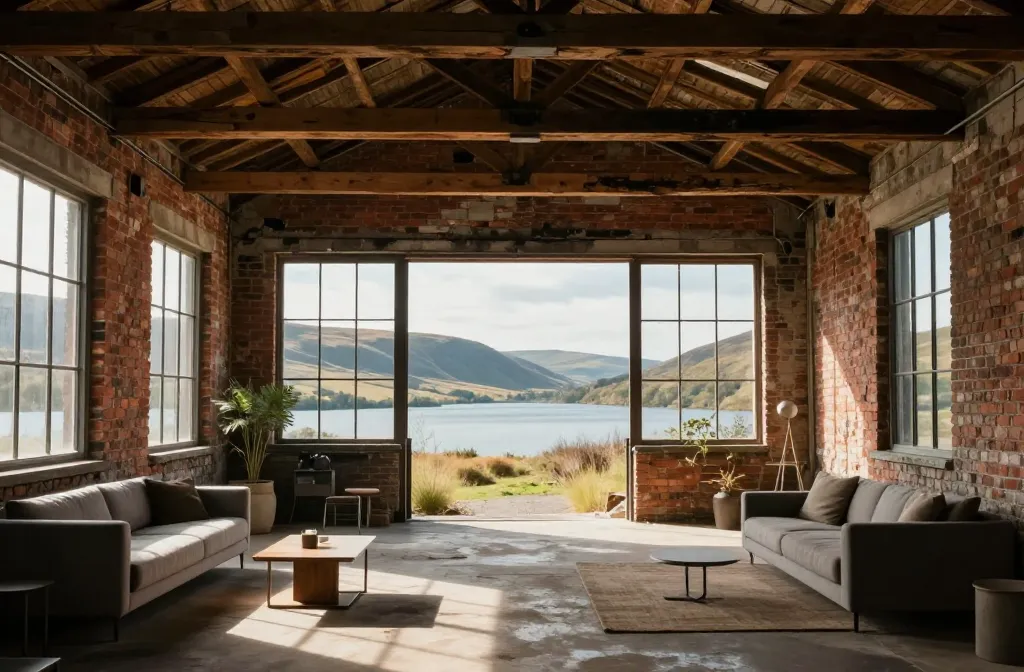
When a derelict shell finally gets a second chance, something in the bones just clicks. You walk through dust, echoes, and a stubborn sense of potential, and you can almost hear the walls whispering, “Make me a home.” Let’s dive into turning that dream into a reality without losing your mind in the process.
Why derelict buildings are secretly gold mines (if you pick them right)
The obvious appeal is obvious: big spaces, character, and a price tag that won’t make your bank account scream. But there’s more under the surface. These buildings often sit on great bones—solid massing, tall ceilings, and a blank canvas that lets you design around the quirks instead of fighting them.
– Space is the selling point: big footprints mean flexible layouts and dramatic light.
– Investment potential: in many places, repurposing beats building from scratch.
– Environmental win: reusing existing structures saves resources and reduces waste.
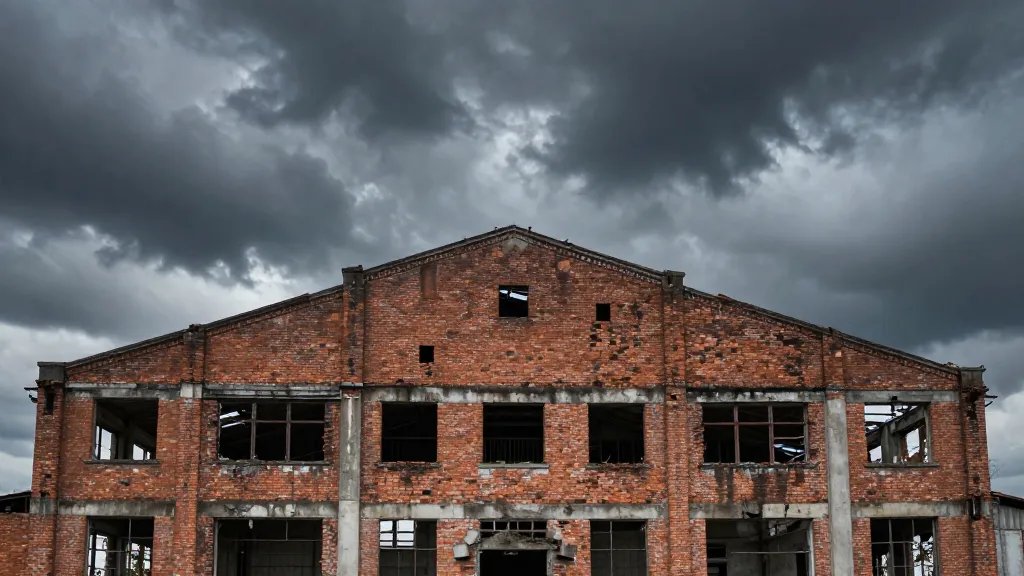
But not every derelict is a treasure. Some come with more headaches than opportunities. Consider location, zoning, structural integrity, and the cost of bringing systems up to modern standards. FYI, the magic formula is: strong bones + smart planning + realistic budget = a home you’ll love.
First pass: assessing the site without crying in the blueprint
Before you get attached to a staircase that would look stunning with a skylight, do a pragmatic audit. You’ll thank yourself later when you’re not knee-deep in surprise issues.
Key checks you should run
- Structural integrity: look for cracks, bowing walls, and rusted beams. If it wobbles, walk away or get a structural engineer in for a solid verdict.
- Utilities and hookups: are there existing services you can reuse, or will you be starting from scratch?
- Water and moisture: check for damp spots, mold, and drainage problems. Water is sneaky and expensive.
- Asbestos and hazardous materials: don’t panic, just hire professionals to test and remove safely.
- Zoning and permissions: can you actually convert this into a home? Some places have tight rules about what counts as habitable space.
How to budget this phase
- Get a professional assessment for structure, electrical, and plumbing.
- Budget a contingency—things always cost more than you expect, especially with older buildings.
- Prioritize must-have upgrades (heat, insulation, safety) over wish-list perks.
Designing with the bones: making the most of odd layouts
Old buildings rarely come with a neat, square plan. That’s where the fun begins. You get to embrace quirks rather than fight them.
Layout tricks that feel modern yet true to the space
- Open cores: keep a central living area open and let the rest tuck into nooks built around it.
- Mezzanine magic: if height allows, a mezzanine can add a bedroom or studio without expanding the footprint.
- Adaptive zones: use movable screens, curtains, or sliding panels to carve spaces on demand.
Materials that respect the past and keep you sane
- Keep original wood or brick where it’s sound—these are your design anchors.
- Mix vintage charm with modern finishes for a balanced vibe.
- Think energy efficiency: insulating windows, proper sealing, and efficient HVAC.
The practical side: systems, permits, and timelines
Dreams are great, but bathrooms and boilers are where dreams go to get real. Here’s the practical backbone to your atmosphere-filled adventure.
Permits you’ll likely encounter
- Building permits for structural changes, electrical wiring, and plumbing upgrades.
- Zoning variances if you’re changing usage from a non-residential to residential space.
- Historic preservation approvals if the building wears its age like a badge of honor.
Electrical, plumbing, and heating—bring them up to code
- Wiring: old wires can be dangerous; plan a full replacement with modern circuits and outlets.
- Plumbing: expect lead lines or corroded pipes in older buildings—budget for replacement and pressure checks.
- Heating and cooling: many derelicts need an efficient HVAC setup or radiant heating; choose a system that fits the space and climate.
Timeline reality check
- Seasonality matters: weather can delay exterior work and interior finishing.
- Permitting timelines vary wildly by location—don’t plan a kitchen reveal around a permitting lull.
- Factory finishes and custom parts take time—factor in bespoke elements early.
Finishes that make it feel like home, not a construction site
Here’s where the magic happens. The shell is ready; you just need to dress it with the right details.
Aesthetic anchors that honor history
- Preserve standout features: exposed bricks, timber beams, old doors—these are not decorations, they’re character.
- Color and light: light walls to bounce brightness; dark accents can be dramatic in the right dose.
- Texture game: mix rough-hewn surfaces with smooth modern finishes for balance.
Functional zones that feel effortless
- Open-plan living with a defined dining or work area helps the space breathe.
- Kitchen layouts: a compact galley can work beautifully in long, narrow spaces.
- Storage where you least expect it: under stairs, behind movable panels, built into nooks.
Financing the dream: how to fund a restoration project without regretting life choices
Money talks, and it talks like an overenthusiastic friend at a garage sale. Here’s how to keep the conversation sane.
Funding options and tips
- Traditional mortgage for the structure, plus separate draws for renovations (called a renovation loan in many markets).
- Grants and tax incentives: some regions offer credits for energy efficiency or historic preservation.
- Partnerships or investors: if the project has strong potential, a partner might help cover the cost in exchange for equity or a future buyout.
Cost-saving moves that don’t suck the soul out of the project
- Reuse and recycle: salvage original fixtures where possible.
- Phased approach: tackle essential upgrades first, then add the fun stuff as funds allow.
- Hire smart, not just cheap: a good team saves money in the long run by avoiding mistakes and delays.
Community, lifestyle, and the soul of the project
Turning a derelict into a home isn’t just about walls and ceilings; it’s about stitching into a neighborhood and building a life.
Location can make or break the vibe
- Proximity to transit, shops, and green spaces shapes daily life far more than you think.
- Neighbors and the streetscape influence long-term happiness as much as square footage does.
Turning risk into a lifestyle choice
- Yes, it’s messy sometimes, and yes, there will be dust. Embrace it as part of the process rather than a personal attack.
- Public perception can surprise you—your bold choice might become the coolest thing in the block.
Future-proofing your home: sustainability and adaptability
You’re not just building a place to live today; you’re shaping something that should age well.
Sustainable decisions that pay off
- Insulation first, finishes second: a well-insulated shell cuts heating and cooling needs dramatically.
- Efficient systems: LED lighting, modern HVAC, and smart controls save money and comfort in the long run.
- Water efficiency: low-flow fixtures and rainwater capture where possible.
Planning for changes in life
- Flexible spaces: rooms that can morph from guest bedrooms to home offices or studios without major upheaval.
- Safety and accessibility: consider future needs with wider doorways, non-slip floors, and accessible layouts where feasible.
FAQ
Is it cheaper to restore or build anew?
Restoration often wins on the emotional side and can be cheaper if the structure is sound and you reuse key elements. However, if you uncover massive hidden problems, the costs can skyrocket and approach or exceed new construction. Do a thorough assessment before you fall in love with the past.
How long does a typical derelict-to-home project take?
Timeline varies by scope and location, but you’re probably looking at 12–24 months for a full transformation. Expect weather delays, permit hiccups, and design decisions that take longer than you think. FYI, patience is your best tool here.
What are the biggest hidden costs?
Structural surprises, asbestos or other hazardous material removal, and updated electrical/plumbing to code. Don’t forget permits and professional fees—they’re not optional unless you enjoy rethinking the entire project later on.
Can I live in a derelict while renovating?
Sometimes, yes, if the building meets basic safety standards and you’re comfortable with the logistics. Most people opt for a temporary home nearby and move in gradually as major systems come online. It’s a juggling act, but totally doable with planning.
What should I do first if I find a promising building?
Call in a structural engineer and an architect familiar with renovations. Get a clear sense of potential, required permits, and a rough budget. Then sleep on it, because romance with brick and timber tends to blur numbers quickly.
Conclusion
Turning a derelict building into a home is part scavenger hunt, part design sprint, and a healthy dose of stubborn optimism. You’re not just adding walls; you’re crafting a living story that respects the past while embracing the future. It’s messy, messy, beautiful work—like learning to ride a bike on a sidewalk that once hosted warehouses and crumbling factories. And when you finally stand under a sunlit room that didn’t exist a year ago, you’ll know every long night of planning, every squeaky negotiation with permits, and every boldly chosen material was worth it. So grab a coffee, pick a door, and start listening to the place. It’s got a lot to say—if you’re willing to listen and build. IMO, this is how homes should feel: earned, a little wild, and entirely yours.